Whisk, Bake, Repeat: What’s It Like to Bake at IDIM DIY Bakery

Only a few years ago, social media was awash in people sharing their baked goods made from scratch. Many indeed turned to baking during those times, which provided a kind of sanctuary and stress relief when most of us were cooped up in our homes.
Fast forward to post-pandemic, and some are still kneading and whisking away, while others have even turned their hobby into a passion. This is the reason IDIM DIY Bakery was brought into the Philippines, seeing how many Filipinos have become curious about the cooking method. It made sense that a Do-It-Yourself bakery would be a unique and exciting thing to bring into the local market.
IDIM, which stands for “I Did It Myself,” is an international brand established in Taiwan over twelve years ago. Today, they’re the first and leading DIY Bakery in Asia, with several outposts in countries like China, Macau, and Vietnam. The out-of-the-box bakery concept landed in Manila in 2022 with the opening of their first store in SM Megamall. As expected, it was a hit and was quickly followed by store openings in SM North Edsa, Ayala Malls Manila Bay, SM City Sta. Mesa, and SM Mall of Asia — which is set to open in two months!
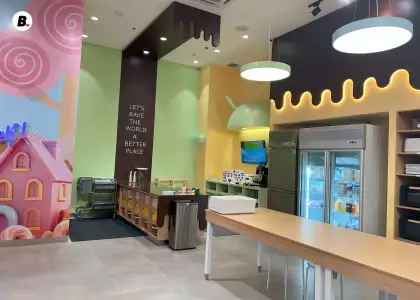
The Beat Manila got to attend the opening of their newest store in SM City Sta. Mesa last June 20, and we couldn’t resist the opportunity to roll up our sleeves and take part in the experience to see firsthand whether IDIM DIY Bakery’s promise that “anyone can bake” truly holds up.
DIY Baking Experience Walkthrough
Step 1: Choose Your Confection
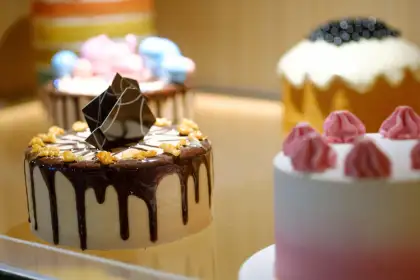
Stepping into their studio, you’ll be presented with a DIY Menu that has all their offerings from the decorative and classic cakes, fillings, and pastries. They have a bunch of decorative designs like colorful unicorn and rainbow cakes, to whimsical character cakes complete with adorable toppers! They’re available in six-inch one-tier (P1,199) or two-tier (P1,599) sizes, and can be worked on by two people. You will also need to choose a cake base, which can either be Chocolate Moist or Classic, and decide on the filling, which could be chocolate, caramel, strawberry, or blueberry.
Meanwhile, their classic cake delights include a range of fan-favorite flavors such as Red Velvet, Cheesecakes, Chocolate Oreo, Black Forest, and Strawberry Shortcake. Prices range from P899 to P1,399, depending on flavor, size, and design.
If you’re not big on cakes, you can also go for pastries, such as Bear Madeleins (P1,099), M&M’s Cookies (P1,099), S’mores Brownies (P1,149), and Mini Donut Macarons (P1,149).
Customers are given two hours to bake these goodies from scratch. Each menu item is also labeled with difficulty levels so you’ll know exactly what you’re getting into. However, regardless of the level, IDIM DIY Bakery guarantees that anyone can accomplish a baking session with their easy-to-follow instructions and accessible stations.
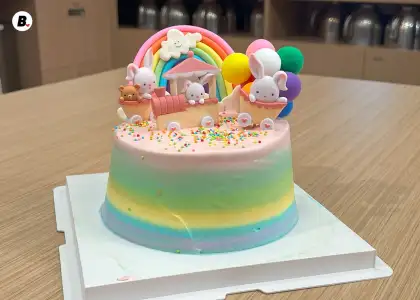
We decided to go for the decorative Rainbow Cake, because #PRIDE, and the bunny and rainbow toppers were too cute not to go for!
Step 2: Prepare Your Ingredients
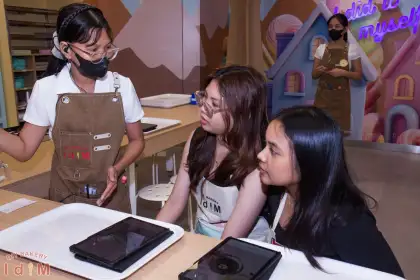
After choosing your cake, you’ll be given wristbands and a tablet. Your tablet is basically your baking JARVIS, and will guide you through the baking process, step by step.
Before starting, head over to their washing station to get your hands cleaned. Hooks are available under each table for your bags, but there are also lockers available for use. Afterwards, you can grab an apron and return to your designated table to start.
The first step is to prep the ingredients, which can be found in the ingredients station on one side of the studio. One thing we noticed at this station is that all items are organized in such a way that they’re easy to spot. Each item is also clearly labeled, color-coded, and listed on the tablet, so you won’t have any difficulty finding the things you need. IDIM DIY bakery also prides itself on providing customers with premium ingredients, with most of them imported from their partners in Taiwan. If you look into the refrigerator, you can still see the brands of some of the items, proving that they’re very transparent, and guaranteeing that each cake or pastry will be made from the best ingredients.
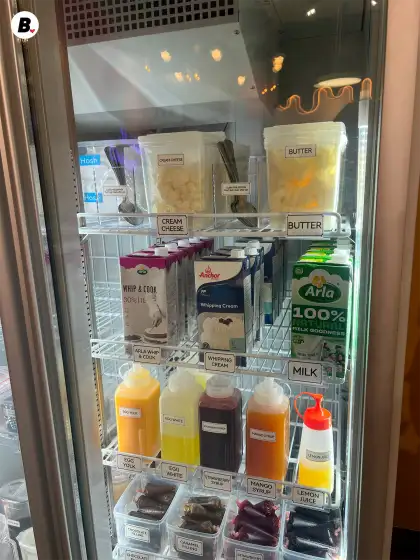
Apart from the products, you’ll also find complete sets of baking tools and equipment such as mixing bowls, spatulas, weighing scales, and timers. Everything is neatly arranged, so it’s not hard to believe that anyone without baking experience or who hasn't spent that much time in a kitchen can do everything on their own. It’s like being in a life-sized play kitchen!
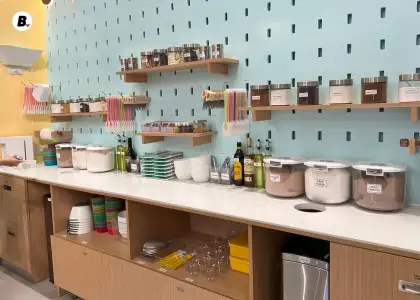
Should you need some assistance or clarification with certain instructions, their staff, who are all trained chefs, are ready to help.
Step 3: Let’s Bake!

After measuring and gathering all the ingredients onto your tray, it’s time to mix them all up! On one side of the studio are rows of high-quality electronic mixers. Now, they may look intimidating at first glance, but when in doubt, simply look down. By down, we mean at the helpful step-by-step instruction labels on the table, which teach you how to operate the kitchen device.
Along with the tablet guide, you’ll be instructed on how to incorporate each ingredient, how fast the mixer should be, and for how long you should mix it. A general rule is not to mix them all at once. If the written instructions still have you scratching your heads like we experienced a couple of times, there are visual versions available in the form of video tutorials on the tablet that are quite helpful and cleared our confusion instantly.
While mixing, you’ll also be asked to gather your baking trays and cake molds, which can be taken from their well-labeled equipment rack. Once you’ve taken the mix out of the bowl and into the molds, simply pop it into one of the ovens, set your timer, and let it bake!
Our cake mix only took around 17 minutes to bake, which gave us a lot of time to decorate!
Step 4: Time to Decorate!
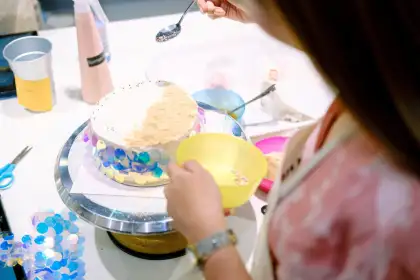
We highly recommend preparing your frosting while your cakes cool down on the rack, especially if you’re creating an ambitious rainbow cake that requires at least six different frosting colors. Decorating creams can be found in the chillers, plastic piping bags on the equipment shelf, and food coloring in the ingredients station.
At the decorating station, you’ll find several cake turntables where you can pile up your cakes. The tablet tells you how to cream, stack, and repeat. We decided to go for a caramel-filled chocolate cake, so in between stacking, we got to pipe a generous amount of caramel, so this was the part where things got a little bit sticky and messy. But it’s all part of the fun!
After approximately fifteen minutes of trusting the process, our rainbow cake was ready for its final touches. Depending on your design choice, toppers are packed in little plastic bags under the station’s table. The rainbow cake included about four toppers plus sprinkles.
Step 5: Pose with Your Cake
Once you’re done, it’s time to show off your beautiful cake creations to the world! Take lots of snaps of your cake at your table or pose by one of their photo spots in the store. Afterwards, one of the staff can pack up your cake for you to take home, wrapped like a present with a ribbon.
Look at how our Rainbow Cake turned out!
An Enjoyable Experience for Everyone
No prior baking skills? No problem. Whether you’re a seasoned baker or just someone with a sweet tooth and curiosity, baking at IDIM DIY Bakery is a piece of cake! With their easy-to-follow instructions, premium ingredients, and user-friendly kitchen appliances, this studio makes baking fun and enjoyable for everyone!
Their spacious and charming studio spaces also make perfect venues for any type of event, from birthday parties to team-building activities. IDIM DIY Bakery offers various packages for venue rentals, and also does off-site events such as their baking caravan, so you can bring the baking party right to your doorstep!
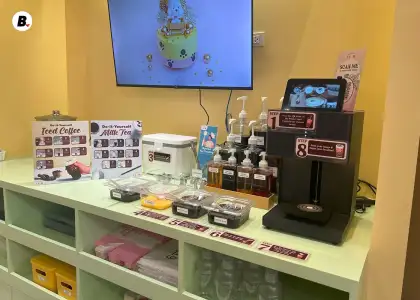
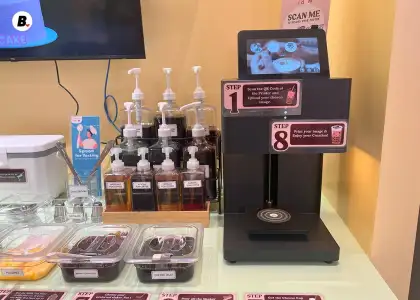
A special feature you'll only find at their new SM City Sta. Mesa branch is the DIY Iced Coffee and Milk Tea stations, which allow customers to whip up their own beverages. This is your chance to become a barista for a day!
For someone who doesn’t have much experience in baking, we have to say that IDIM DIY Bakery is the perfect place to start your baking journey, as it’s a great way to familiarize yourself with the process and the equipment. Baking requires a lot of tools and ingredients, so it’s convenient to have a place where you can try them out first and learn the ropes — all for the cost of buying a regular cake from a store.
10/10 would recommend trying with family and friends. You won’t only come out of it having fun, but also with a delicious confection to go!
To know more about their offerings and locations, visit their website or follow IDIM DIY Bakery PH on Facebook, TikTok, and Instagram.
Get the latest curated content with The Beat Asia's newsletters. Sign up now for a weekly dose of the best stories, events, and deals delivered straight to your inbox. Don't miss out! Click here to subscribe.


